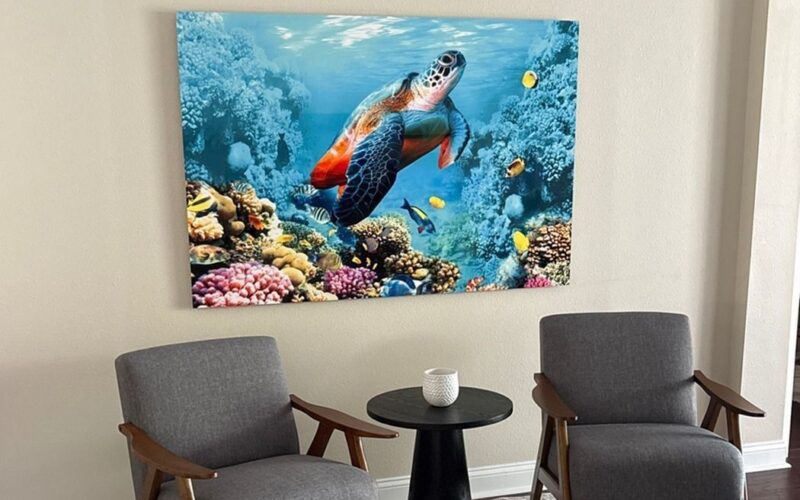
A photograph changes when it leaves the screen. Metal gives it a surface, a scale and a place in the room—and gives professional photographers another way to complete the work.
On a phone, even an ambitious photograph must compete with the next image. On a wall, it has a different relationship with its audience. People can return to it in changing light, notice details from across a room and associate it with the space in which they live or work.
Metal prints can make that transition particularly direct. A clean edge and an unobtrusive mount allow the image itself to establish the visual presence. For a professional photographer, however, the material is only the starting point. The quality of the result depends on image selection, finish, proofing and the care taken with presentation.
The opportunity is to offer a finished piece of work, supported by the same judgment that shaped the original photograph.
Understand what is being printed
In dye-sublimation metal printing, heat transfers dyes into a coating on an aluminum panel. ChromaLuxe describes its indoor metal products in those terms: the image is held in the coated surface, rather than being a paper photograph placed behind glass. The specific panel, coating and printing process matter, so ask the lab to identify the product it supplies.
A quotation that simply says “metal print” leaves too much unresolved. Establish the surface, thickness, edge treatment and mounting system before promising a client a particular appearance. Order a sample of the actual product. A screen preview cannot show how an edge catches the light or how far the finished piece will sit from the wall.
The finish becomes part of the photograph
ChromaLuxe offers white and clear base options in several finishes. A white base provides the light areas beneath the image; a clear coating allows the aluminum’s character to show through lighter portions. Gloss, semi-gloss and matte surfaces also change the way a print interacts with room lighting.
Those choices deserve the same attention as a paper selection. A luminous coastal scene may work beautifully with a glossy treatment, while a quiet portrait might benefit from a less reflective surface. Clear metal can become an expressive choice when the material’s presence suits the picture. It should be selected intentionally, especially where skin tones, snow or other pale areas are important.
Evaluate samples where the artwork will actually be seen. Large windows, ceiling lights and the viewer’s usual position can influence the experience as much as the finish’s name.
Choose photographs that can sustain a wall
Start with composition. A photograph that depends entirely on immediate color impact may become less satisfying with repeated viewing. Look for an image with a clear visual structure and enough depth to invite another look: a relationship between foreground and distance, an expressive animal portrait, or architectural lines that remain compelling at scale.
Make a small, deliberate edit for each purpose. A coastal series for a hospitality interior might share a restrained palette and consistent horizon treatment. A portrait studio might offer one strong environmental image as a statement piece. A wildlife photographer could build a pair around gesture or direction of movement.
Show the work as it could be lived with. A grouping should have a reason beyond filling the available space. Matching finishes, compatible proportions and thoughtful spacing help a collection feel intentional.
Build a repeatable proofing process
Begin with the lab’s file specifications. Bay Photo’s MetalPrints guidance, for example, recommends JPEG files with an embedded Adobe RGB profile and 200–300 pixels per inch at the intended print dimensions. That is a provider-specific recommendation, not a universal rule for every lab.
Work backward from the finished size. A 24-by-36-inch file at 240 pixels per inch measures 5,760 by 8,640 pixels. Changing a resolution label does not create missing detail. Inspect the image for focus problems, processing artifacts and weak edges before deciding how large it should go.
Use a calibrated display and ask whether the lab provides a suitable soft-proofing profile. Keep a separate print version so adjustments do not overwrite the master file. Pay attention to shadow separation and bright areas: the glow of a monitor can conceal problems that become obvious on a reflective print.
Order a physical proof in the final surface. Include a critical area at the intended reproduction scale when detail is important. Bay Photo notes that its metal process can produce differences in color, brightness and saturation from other printing methods. A proof makes those differences something you can evaluate rather than discover after delivery.
Record the approved file, surface, dimensions and lab settings. That record becomes especially useful when a client orders another piece months later.
Sell a considered presentation
A sample print does work that a product description cannot. Let a client see the surface, inspect the edge and understand the mounting arrangement. Present a few appropriate sizes alongside a room photograph or a clearly labeled digital room preview. Keep the preview’s scale credible; an oversized rendering can create expectations that the real order cannot meet.
For commercial projects, develop a concise selection sheet with image titles, dimensions, finishes and proposed placement. Include the practical details that help an interior designer or business owner make a decision: the number of pieces, the intended grouping and what the delivery includes.
Artistic Creationz’s metal print collection provides one example of presenting landscape, wildlife and architectural images as finished wall-art options. Its collector imagery also illustrates why room context matters: a photograph is experienced in relation to furniture, wall space and the viewer’s distance.
Disclosure: Shutterbug News publisher Neal Nachman is also a photographer at Artistic Creationz. The studio is included here as an affiliated example; the production guidance applies to professional print workflows generally.
Price the complete job
The lab’s invoice is one component of the cost. A professional quotation should account for file preparation, test prints, packaging, freight, hardware, payment or sales-channel fees, and any installation or replacement allowance appropriate to the job. Add the value of the photographic work and the time required to manage the order.
Separate the creative decision from the arithmetic. First determine the presentation that serves the picture and the client. Then calculate whether the proposed price supports delivering it consistently. A larger print can increase revenue while also increasing shipping exposure and handling time; size alone does not establish a better margin.
Be specific about what a collector receives. If a work is sold in a limited edition, define the edition accurately and maintain consistent records. A title, signature, image description and care sheet can help document a purchase without making unsupported claims about future value or collectability.
Finish with delivery, hanging and care
Confirm the mount before ordering. Bay Photo’s options include float mounts and inset frames with French cleats, with availability depending on size and product. Hardware must suit the finished piece and the wall; a large commercial installation may call for a professional installer.
Agree on access, delivery timing and who handles hanging. Keep packaging until the artwork has been inspected, and make the handoff clear enough that a client does not have to improvise. The last few practical decisions are part of the photographer’s service.
Supply the manufacturer’s care instructions. Bay Photo advises nonabrasive cleaning and avoidance of ammonia for its MetalPrints; other products may have different requirements. Do not assume an indoor panel is suitable for direct sun or outdoor exposure. Outdoor-rated products are a separate specification that should be confirmed with the supplier.
Likewise, treat permanence claims precisely. Published testing of one combination of panel, coating and ink does not establish the life of every metal print. Use documentation for the actual product, rather than promising that any photograph on aluminum will last a fixed number of years.
A photograph with somewhere to belong
The strongest reason to offer metal prints is the opportunity to complete a photograph thoughtfully. The surface should support the image, the size should suit the room, and the presentation should feel resolved from the first proof to the final installation.
For the photographer, that requires a little more work than uploading a file. For the person who lives with the result, it can mean the difference between another picture in a feed and a photograph that becomes part of everyday life.
Technical references: ChromaLuxe Indoor Metal Prints product guidance; Bay Photo MetalPrints FAQs and care guidance; and Wilhelm Imaging Research’s published testing of specified ChromaLuxe and ink combinations. Reviewed September 12, 2026. Opening image: photographic wall art displayed in an interior, courtesy of Artistic Creationz’s Collector Gallery; shown as a presentation example.