The first mistake in autumn photography often happens before the camera leaves its bag: deciding that an entire season will be won or lost on a single weekend. A map promises color. A familiar overlook promises a composition. Somewhere between those two promises, the actual landscape can disappear from view.
For fall 2026, a more rewarding approach begins with flexibility. There will be broad hillsides worth photographing, but also wet leaves on dark stone, a nearly bare tree beside a river, and small pockets of color that arrive before or remain after the advertised peak. A successful autumn photograph gives those details a purpose. It tells us how the season feels in a particular place.
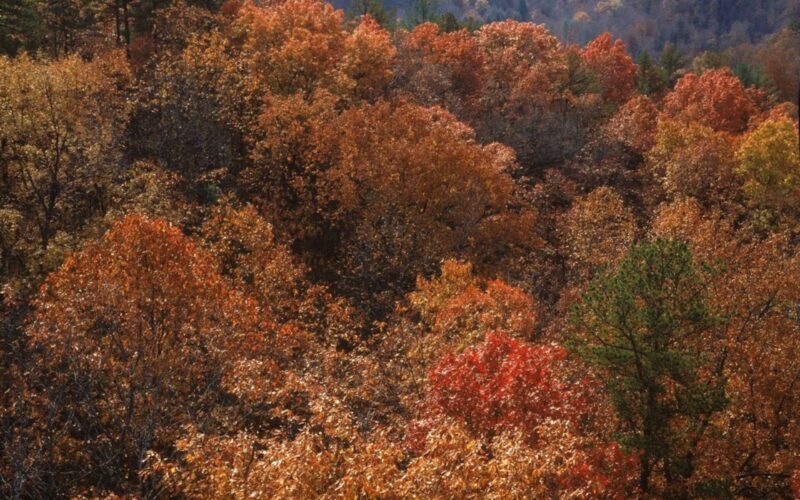
Opening photograph: Middle Creek Overlook, Big South Fork National River and Recreation Area. Credit: National Park Service. This archival photograph illustrates the season and does not show current 2026 conditions.
Plan for a season, not a promised peak
Fall color develops unevenly. The National Park Service describes the Great Smoky Mountains’ season as a progression across elevations, with higher country generally changing before lower valleys. Weather influences the display, and exact peak dates are difficult to predict. A calendar can suggest when to start paying attention; it cannot guarantee the appearance of a specific hillside on your arrival.
Build a trip around several possibilities within a manageable area. Identify a higher viewpoint, a lower woodland, a sheltered stream, and a nearby subject that works without colorful foliage. Check current park notices, road access, and recent local condition reports shortly before departure. Treat an old photograph as inspiration rather than evidence that the same view is ready today.
Give each day room to change. If the ridge is obscured, a forest interior may be productive. If wind strips the canopy, fallen leaves may become the subject. Booking every hour around distant landmarks makes those adjustments harder and can turn promising weather into a transportation problem.
Find a subject inside the color
Color attracts attention, but structure holds it. Before releasing the shutter, identify what the viewer should notice first. That might be a pale trunk, a bend in a river, or a single red tree against a darker slope. If the answer is simply “everything,” try reducing the frame.
A wide lens can establish a place, especially when the foreground has a clear relationship to the distance. It can also fill the photograph with empty sky and unrelated branches. A longer focal length can isolate bands of foliage or organize overlapping trunks. Neither view is inherently more sophisticated; choose the one that clarifies the subject.
Pay particular attention to the frame’s edges. Half a bright leaf at the border can pull the eye away from a carefully placed tree. A small change in camera position may separate a trunk from a distracting branch. These adjustments rarely announce themselves in the finished photograph, yet they often determine whether it feels settled.
Let the weather choose the scale
Soft overcast light can make a woodland easier to organize by reducing the difference between illuminated leaves and deep shadows. When the sky is featureless, consider excluding it. Work with bark, ferns, reflections, and the subtle differences between neighboring colors instead of waiting for the clouds to perform.
Direct light offers another vocabulary. Backlit leaves can glow, while side light reveals the shape of trunks and ridgelines. Watch bright highlights carefully, especially when a sunlit leaf sits against shade. Review the histogram and highlight warning rather than judging exposure only from a screen that may appear dim outdoors.
Rain changes both appearance and working rhythm. Wet surfaces can deepen the visual separation between leaves and rock, while reflections may either enrich or obscure color. A circular polarizer can reduce glare on foliage and water. Rotate it while watching the image, and stop where the balance looks convincing. Maximum reflection removal is not automatically the most interesting result.
Choose shutter speed for the leaves
A tripod steadies the camera; it does not steady a branch. In a breeze, an exposure that records a stream beautifully may turn the surrounding foliage into accidental smears. Decide which movement matters before selecting settings.
If crisp leaves are essential, use a shutter speed appropriate to their movement and raise ISO when necessary. If the intention is to show wind, allow enough movement to make the decision look deliberate. Make a short comparison series and enlarge the results on the camera. A thumbnail can conceal problems that become obvious in a print.
Be equally deliberate about depth of field. A small aperture may help a scene that extends from nearby leaves to distant trees, but the smallest available setting is not a universal solution. Begin with a moderate aperture, place focus thoughtfully, and check the important areas. Where foreground and background cannot both be resolved adequately, reconsider the composition before turning the scene into a technical exercise.
Make room for the quieter photographs
Try a simple assignment on one outing: make a wide view, a medium composition, and a close detail before moving to the next location. The wide view describes the setting. The middle frame reveals a relationship. The detail asks the viewer to look more closely.
A leaf caught between stones might become the most memorable image of the day because its shape is clear and its surroundings are specific. A hillside photograph may require exceptional light to distinguish it from hundreds of similar views. The smaller subject may depend chiefly on attention.
Let the landscape remain as you find it when presenting the result as an observed nature photograph. Moving leaves into a decorative arrangement changes what the image describes. An arranged study can be worthwhile, but its caption should reflect that choice. Accurate context is part of thoughtful photographic craft.
Edit for believable color
Back at the computer, resist making every channel compete for attention. Begin with exposure and white balance, then compare the brightest colors with nearby neutral areas. If bark turns orange or shaded rocks become intensely magenta, a broad adjustment may be affecting more than the foliage.
Use local corrections to support the visual hierarchy already present. A restrained lift in a shaded subject can help; brightening every corner usually removes the sense of depth. Compare the edit with an earlier version after a break. Familiarity can make excessive saturation seem normal surprisingly quickly.
For a series, judge the photographs together. Different weather should retain its character, but unexplained jumps in color treatment can make one outing look like several unrelated projects. A consistent edit allows a brilliant canopy and a subdued detail to belong in the same story.
Bring home an observation
The most useful question at the end of a fall shoot is not whether you found the maximum amount of red. Ask what you noticed that a hurried visitor might have missed. The answer can guide the next outing more effectively than another list of famous viewpoints.
Autumn’s briefness creates urgency, but photographs benefit from patience. Return to a nearby place as its appearance changes. Work the edges of the season. Give an ordinary stand of trees enough attention to become specific. The photograph that lasts may be the one you could never have scheduled.
Sources and planning context: National Park Service, “Fall Colors” for Great Smoky Mountains National Park and “Fall Colors” for the Blue Ridge Parkway; reviewed September 12, 2026. Polarizer background: photographer Jeffrey Friedl’s field demonstration of polarizing filters and autumn foliage. This is a photography planning guide, not a prediction of peak foliage dates.