A juried photography show can place your work in front of curators, collectors and other photographers—but the submission process rewards more than a strong image. Jurors often review large groups of entries quickly, and galleries need artists who can follow instructions, present a coherent body of work and deliver exhibition-ready files or prints.
The most successful submission is clear, consistent and easy to evaluate. This guide covers image selection, sequencing, file preparation, artist statements, pricing and the final checks that help a photography submission look professional.
Read the call for entries twice
Begin with the rules, not your portfolio. Confirm eligibility, theme, accepted media, image limits, file specifications, entry fees, sales commission, delivery requirements and important dates. Make a checklist before selecting work.
Pay close attention to whether the organizer wants framed pieces, digital files, physical prints or images that have not appeared in previous exhibitions. If the call specifies maximum dimensions, that may refer to the finished framed size rather than the printed image.
Following instructions will not guarantee acceptance, but ignoring them can remove excellent work from consideration before aesthetic judging begins.
Select for the opportunity, not for your entire career
A general portfolio demonstrates range. A juried submission should demonstrate relevance. Choose photographs that respond directly to the exhibition theme and suit the venue, audience and scale of presentation.
If the call accepts several images, submit a compact group that looks intentional. Similar subject matter alone is not enough; the pictures should share visual language, emotional tone or a clear idea. For a deeper approach to cohesion, use the principles in building a photography portfolio people remember.
Lead with your strongest photograph
When the submission system preserves image order, place the strongest and most representative photograph first. It should be visually clear at thumbnail size and establish the quality of the group immediately.
Do not save the best image for a dramatic ending. Jurors may not experience the work as a leisurely sequence. Every frame must stand on its own, while the opening selection should make the reviewer want to continue.
Edit the group for consistency
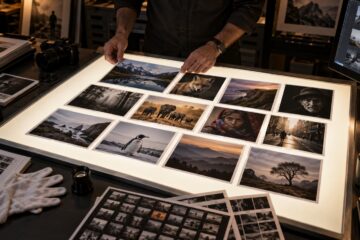
Compare the photographs side by side. Look for abrupt changes in color treatment, contrast, cropping, aspect ratio or visual density. Consistency should not flatten the work, but the group should feel like it came from one artist with a deliberate point of view.
Remove duplicate ideas. Three variations of the same composition rarely make a submission stronger. If you need a repeatable selection method, the Shutterbug News guide to editing a photography series provides a four-pass workflow for narrowing a larger project.
Prepare digital files exactly as requested
Export fresh files for each submission rather than repurposing whatever is already on your desktop. Check the required pixel dimensions, color space, file type, maximum file size and naming convention.
- Use JPEG quality high enough to preserve detail without exceeding the limit.
- Convert to the requested color space, commonly sRGB for online review.
- Resize carefully and apply output sharpening after resizing.
- Remove borders, watermarks and signatures unless the rules request them.
- Use clean filenames and avoid special characters when the portal discourages them.
- Open every exported file to confirm orientation, color and sharpness.
Do not embed your name in a blind-jury file unless instructed. Anonymous judging works only when identifying information stays out of images and filenames.
Write titles that support the work
A title can add context, but it should not rescue an unclear photograph. Avoid generic filenames such as “IMG_4721” and overly elaborate titles that tell the viewer exactly what to feel.
Keep capitalization and punctuation consistent across the submission. If the work is intentionally untitled, use a clear numbering system such as Untitled No. 3 rather than leaving fields blank.
Create a concise artist statement
A useful statement explains what you explore, why the subject matters and how your visual approach supports the idea. It does not need to describe every object in the photographs or rely on academic language.
A strong short statement often follows this structure:
- Project: What body of work is being presented?
- Idea: What question, experience or tension drives it?
- Approach: How do light, color, viewpoint, process or material support that idea?
- Context: What does the viewer need to know that the photographs cannot communicate alone?
Read the statement aloud and remove anything vague, repetitive or self-congratulatory. Let the photographs demonstrate quality; let the statement provide access.
Use a professional artist biography
A biography is not the same as a statement. Write it in the third person unless the application requests otherwise. Include your location, photographic focus, relevant exhibitions, awards, publications and education or professional experience.
Prioritize details that establish context for the work. A short, current biography is more useful than a complete chronological history. Keep a master version, then adapt the length and emphasis for each opportunity.
Choose print materials for the actual venue
If selected work will be printed or delivered physically, consider viewing distance, lighting, durability and the venue’s hanging system. Glossy surfaces can deepen color but may reflect gallery lights. Matte papers reduce glare and create a softer presence. Metal, acrylic and alternative processes can suit certain images but should serve the work rather than function as novelty.
For a detailed comparison of one contemporary display option, see The Finished Photograph: A Professional Guide to Metal Prints.
Frame and finish with restraint
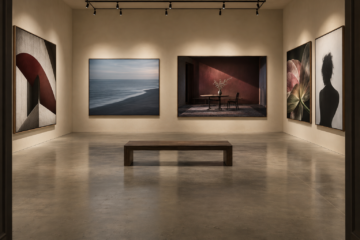
Simple, consistent presentation allows jurors and visitors to focus on the photographs. Use clean mats, secure hardware and archival materials appropriate to the print. Inspect glazing, corners and backing under bright light before delivery.
Label every work according to the organizer’s instructions. Typical information includes artist name, title, year, medium, dimensions, edition and price. Keep packing materials reusable and clearly marked when the show requires return shipping.
Price the work logically
Pricing should account for printing, mounting, framing, edition size, gallery commission, replacement cost and the position of the work within your broader practice. Similar works of the same size and edition should have consistent prices.
Do not raise or lower a price randomly for one venue. Collectors and galleries can compare listings. A simple pricing structure builds confidence and makes future increases easier to explain.
Confirm rights and editing disclosures
Read the image-use agreement carefully. Many shows request limited permission to reproduce accepted work for promotion, catalogs and archives. That is different from transferring copyright. If the terms are unclear or excessively broad, ask the organizer before submitting.
Disclose composites, generative elements or significant manipulation when the rules require it. Documentary, nature and photojournalism competitions often impose stricter editing standards than fine-art exhibitions. Shutterbug News’ discussion of AI and authenticity in photo editing offers useful questions for defining those boundaries.
Proof the complete submission
Before paying the fee or pressing submit, review the application as if you were the juror. Check that titles match files, dates are correct, dimensions use the requested order and the statement refers to the work actually submitted.
- Confirm the deadline and time zone.
- Verify every image opens and displays correctly.
- Check spelling in titles, biography and statement.
- Confirm prices include the required commission.
- Save a copy of the final text and submission receipt.
- Add notification, delivery and pickup dates to your calendar.
If the work is not accepted
Rejection is not a complete judgment of the photographs. Jurors build a show with limited space, a particular theme and relationships among selected works. A strong image may not fit that specific exhibition.
Record where and when you submitted, then review the group after some distance. Look for repeated feedback, but do not rebuild your practice around a single result. Continue refining the work and target opportunities where the subject, presentation and audience align.
Make professionalism part of the artwork
A strong juried-show submission respects both the photographs and the people reviewing them. Thoughtful editing, accurate files, concise writing and reliable presentation remove distractions from the work itself. When every element supports the same artistic intention, jurors can spend their limited time on what matters: the photographs.